
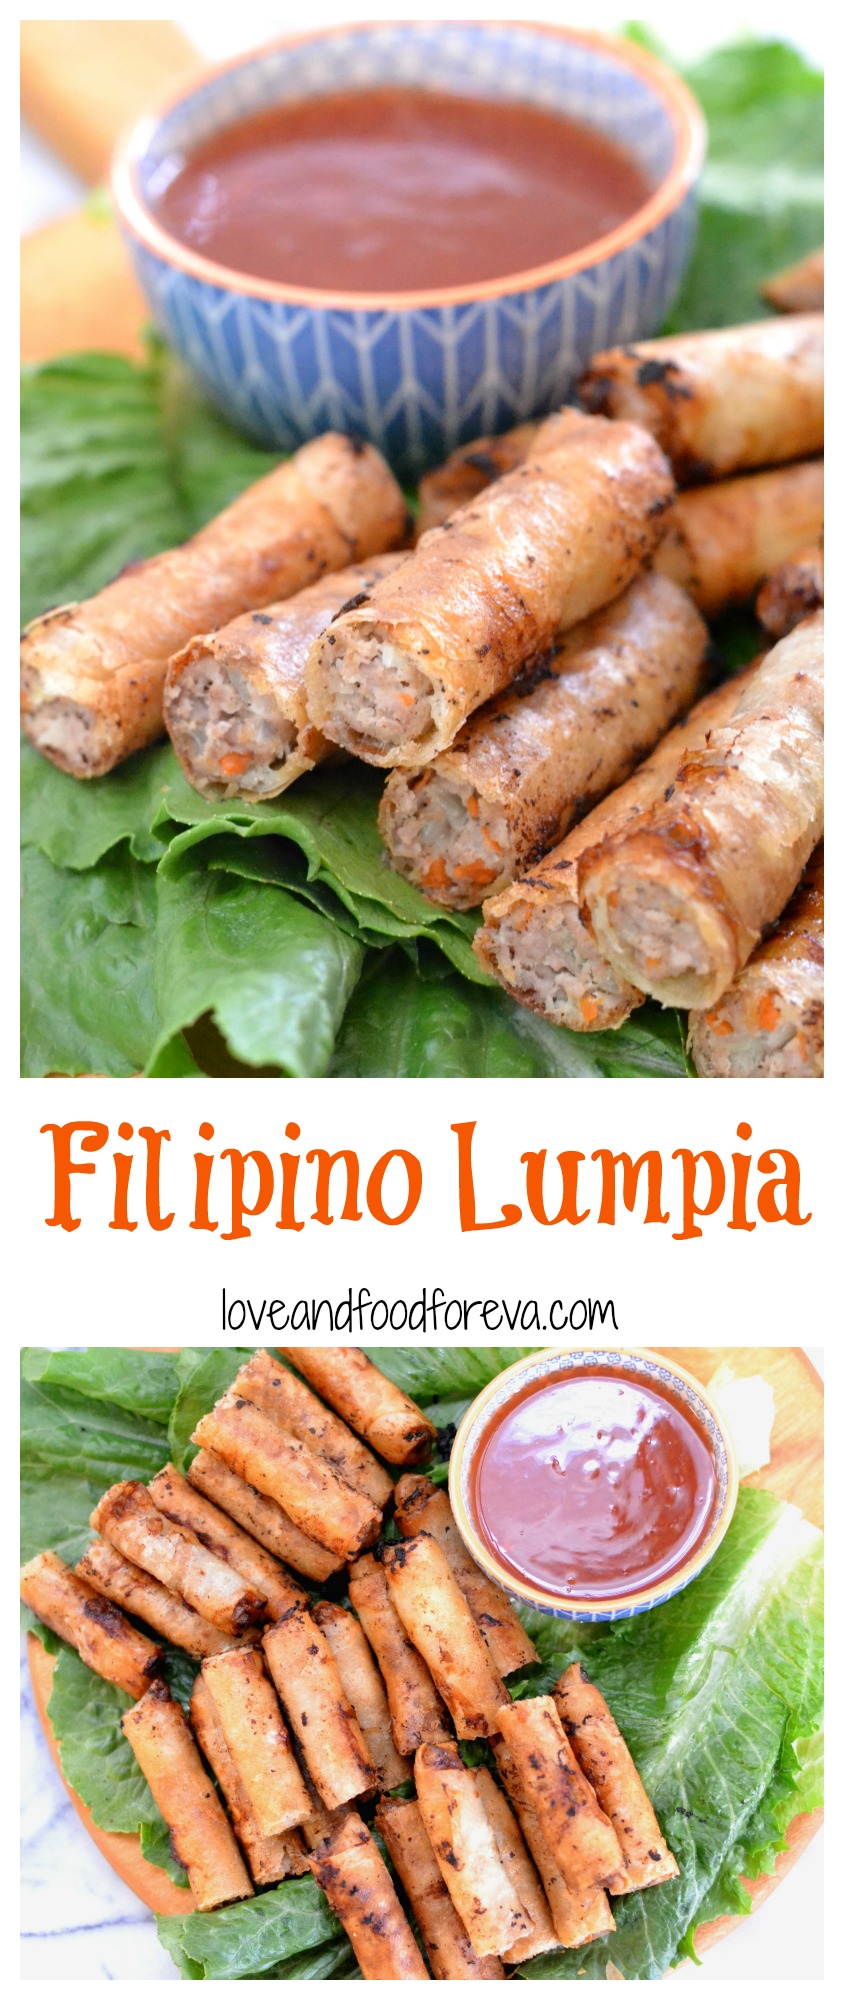
As one holiday ends another holiday is coming up, and that means more food! Growing up, New Year’s Eve always involved a very elaborate dinner spread, including some type of pancit (noodle) dish (to represent a long and happy life in the new year), twelve types of fruit (one for each upcoming month), and always Filipino Lumpia.
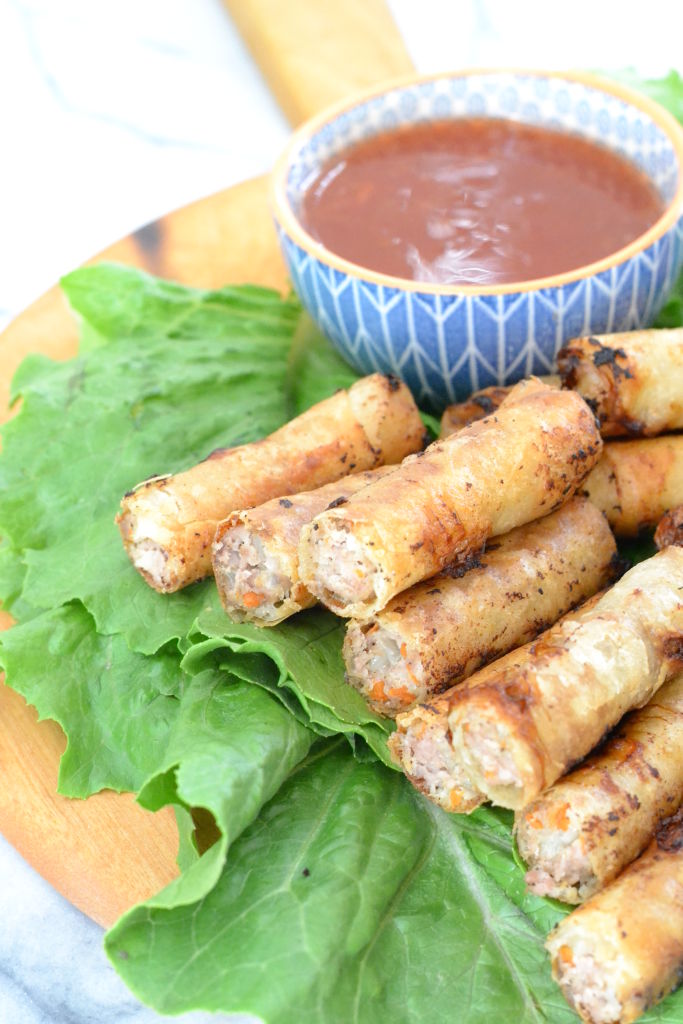
This stuff is basically the food equivalent of crack. You go in thinking ‘ok, I’ll take two pieces.’ Then inevitably you go back for a third and fourth, no big deal. But before you know it you’ve eaten at least a dozen of them, and you’re left wondering what just happened. If you’ve had Filipino Lumpia before, you know exactly what I’m talking about. If you haven’t had them, don’t judge until you’ve been there :)
No surprise, my mom made legitimately the best lumpia I’ve ever had, to this day. My aunt helped me recreate my mom’s recipe by reminding me of all the ingredients she used (thanks Tita Nang!). I don’t think I’ll ever make them as good as she did, but these are a close second and that’s a win in my book!
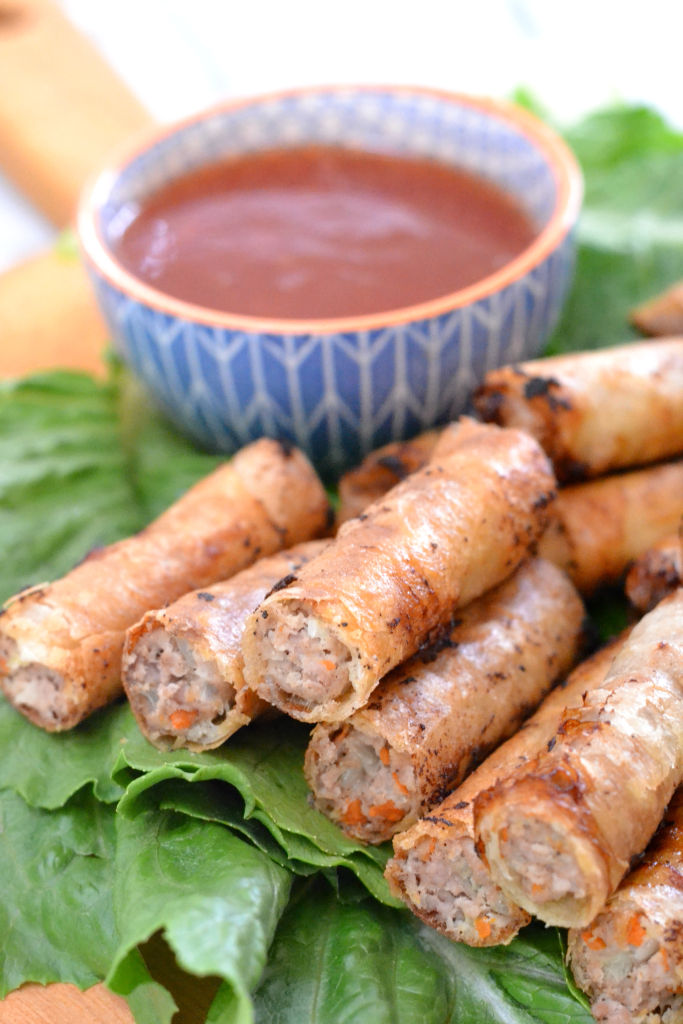
Make sure to serve these with sweet chilli sauce – it’s a must-have so don’t even try skipping it. There are several brands in the international aisle of every grocery store, but this is the one I usually get from the international market:

While Lumpia are very easy to make (there are basically 2 steps to assembling them), it’s a bit time consuming to roll them. But I swear they’re worth it! It just makes me appreciate all the times mom made these so much more knowing how long it takes to make them!
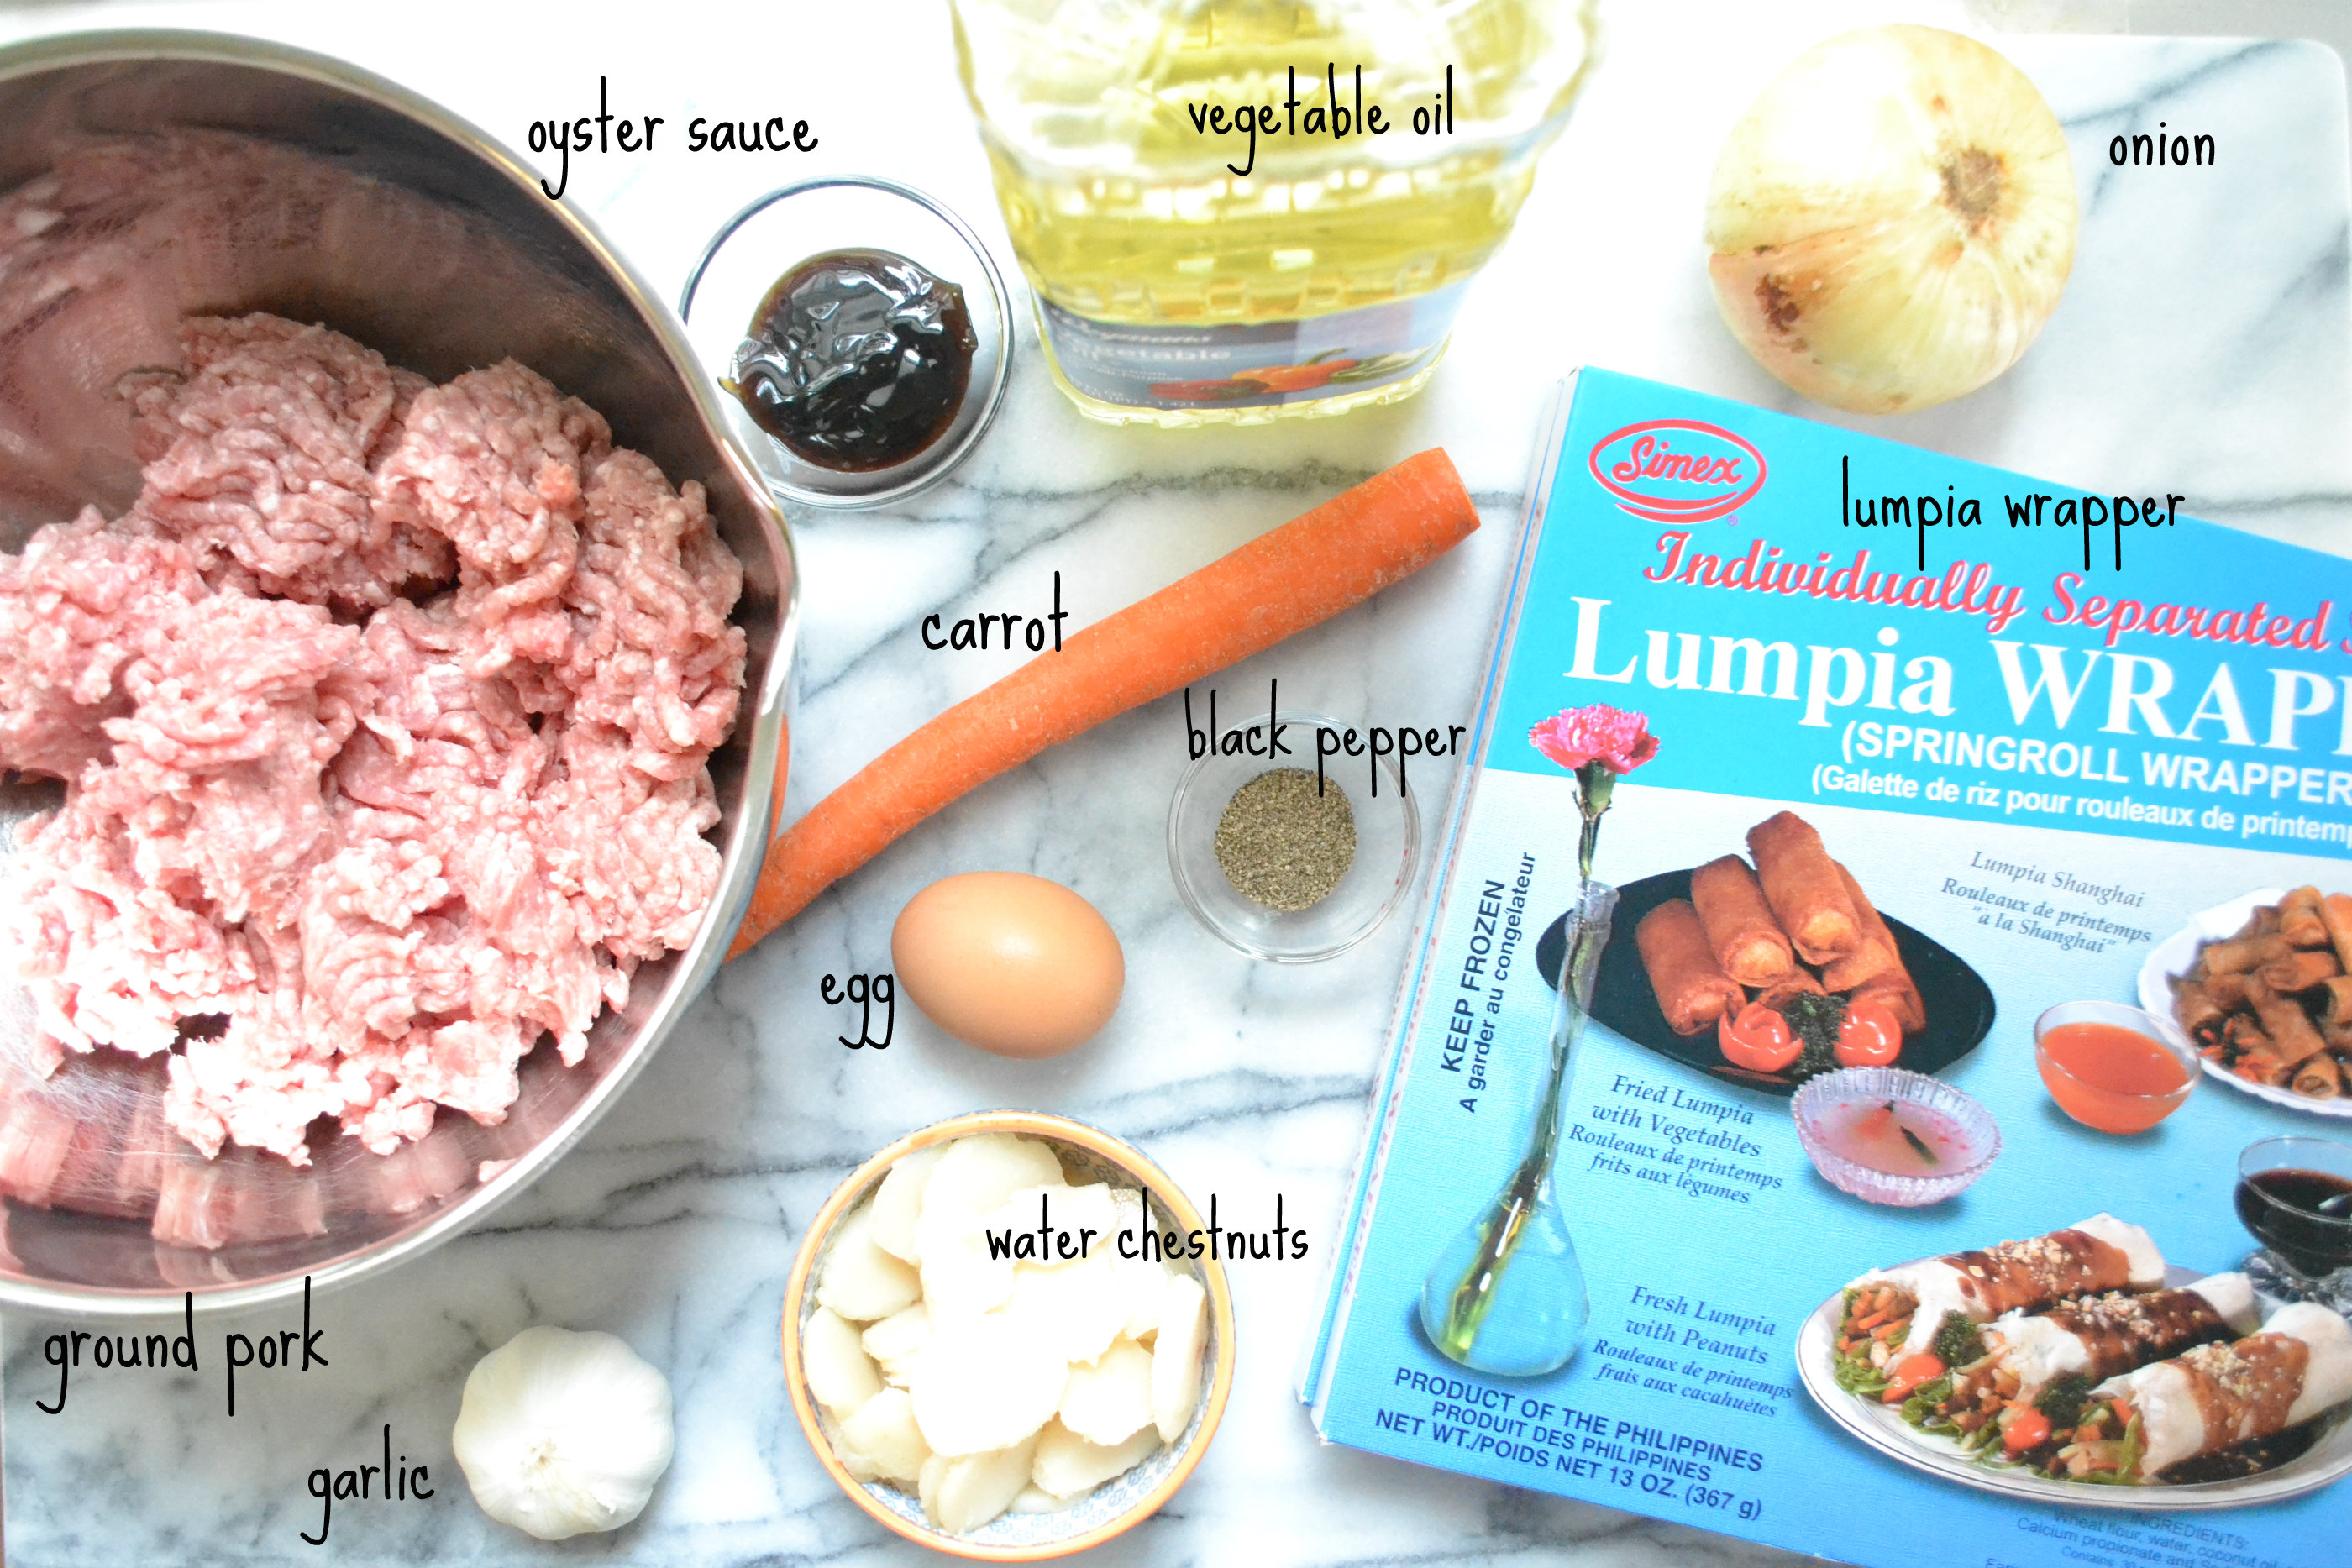
You should be able to find all these ingredients at any international market – where we live there are H-Marts and Coco’s Foods, both of which have all of these ingredients. If you don’t have an international market nearby, you can find canned water chestnuts, oyster sauce, and sweet chilli sauce in the international aisle at your local grocery. (If you can’t find oyster sauce, you can substitute with soy sauce.) You won’t find these specific “Lumpia Wrappers” but you can substitute with any spring roll wrappers, which all grocery stores have (usually in the refrigerated part of the produce section).
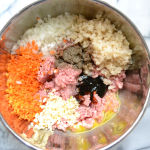
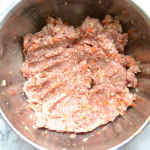
Step 1: Chop all the vegetables (garlic, onion, carrot, and water chestnuts) very finely and add them to the ground pork, egg, oyster sauce, and black pepper in a large mixing bowl. Combine ingredients thoroughly, using your hands.
Step 2: Roll!
Fill a small bowl with water (more on this in a bit).
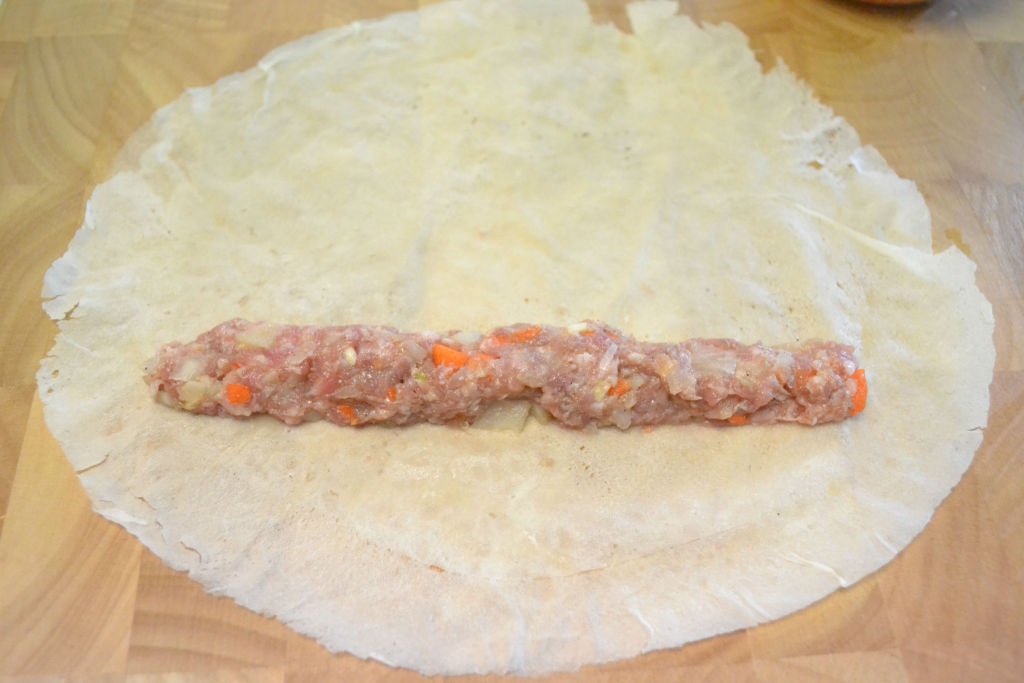
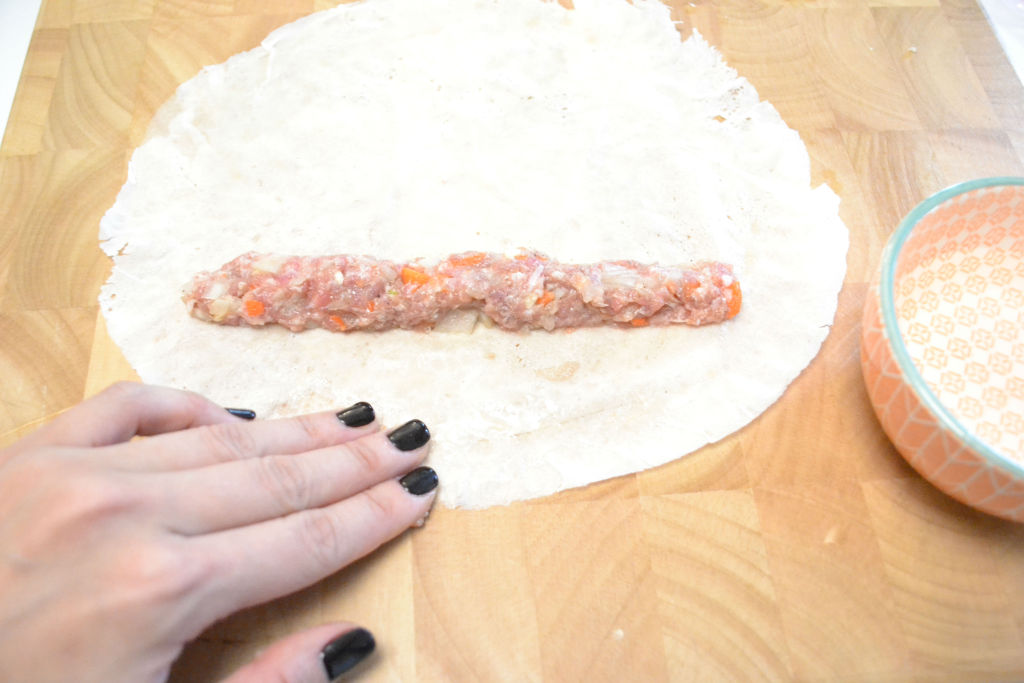
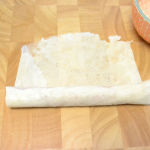
Take out a wrapper, then spoon out one very heaping Tablespoon of filling (I did between 1 1/2 Tablespoons to 2 Tablespoons). Evenly spread the filling across the bottom third of your wrapper using your hands, making a straight line but leaving a half an inch of wrapper exposed on each side:
Dip your fingers into the small bowl of water and then dab your fingers all around the wrapper – the water will be the glue to keep the wrapper together. You’ll need to dip your fingers into the water bowl at least twice to get all the edges wet.
Then roll the bottom piece of wrapper towards the top, covering the filling. Next fold the left and right sides towards the center:
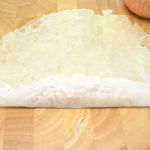
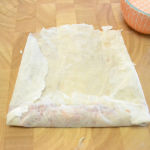
Now, tightly roll towards the top of the wrapper. You may have to add a bit of water to the edges to make it easier to roll and keep the wrapper together.
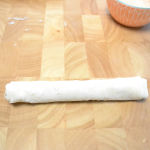
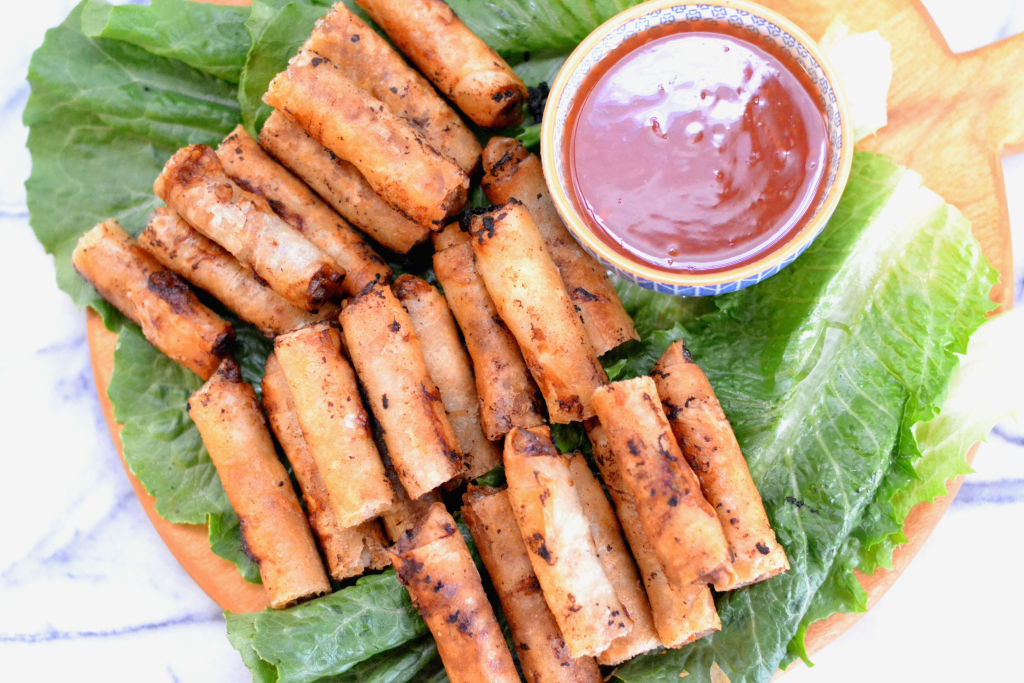
After a bit of time you get a tower of lumpia…YES!!!

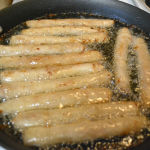
To cook them, add about half an inch of vegetable oil to a frying pan or cast iron skillet. Heat over medium-high heat for at least 5 minutes – it needs to be very, very hot. When ready, carefully add the lumpia one at a time to the oil. Fry for about 4 minutes, then flip. Fry for another 4 minutes until golden brown. Make sure to pay attention while they’re cooking so they don’t burn. Drain on paper towels.
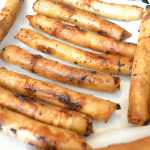
Resist the urge to shove one in your mouth when you take them out of the oil. They will be HOT. I’ve burned the roof of my mouth once or twice before, trust me on this one. Cut them into smaller pieces for easier consumption :) And of course, serve with sweet chilli sauce.
Heaven……
- 2 lbs ground pork
- 1 medium onion, finely minced
- 1 medium carrot, finely minced
- 6 cloves garlic, finely minced
- 8oz can water chestnuts, finely minced
- 1 teaspoon freshly ground black pepper
- 3 1/2 Tablespoons oyster sauce (or soy sauce if you can't find oyster sauce)
- 1 egg
- 2 packages paper thin Lumpia wrappers (or Spring Roll wrappers), thawed
- Vegetable oil, for frying
- Sweet Chilli Sauce
- In a large bowl add the first eight ingredients: ground pork, onion, carrot, garlic, water chestnuts, black pepper, oyster sauce, and egg. Mix together thoroughly using your hands.
- Fill a small bowl with water.
- Take out one wrapper and spoon a heaping Tablespoon (I use between 1 1/2 and 2 Tablespoons) of filling. Evenly spread the filling across the bottom third of your wrapper using your hands, making a straight line but leaving a half an inch of wrapper exposed on each side.
- Dip your fingers into the bowl of water and then dab your fingers all around the wrapper - the water will be the glue to keep the wrapper together. You'll need to dip your fingers into the water bowl at least twice to get all the edges wet.
- Roll the bottom piece of wrapper towards the top, covering the filling. Then fold the left and right sides of the wrapper towards the middle. Finally, tightly roll towards the top of the wrapper.
- You may have to add a bit of water to the edges to make it easier to roll and keep the wrapper together.
- Repeat with the remaining wrappers and filling.
- To cook, add about half an inch of vegetable oil to a frying pan or cast iron skillet. Heat over medium-high heat for at least 5 minutes - it needs to be very, very hot. When ready, carefully add the lumpia one at a time to the oil. Fry for about 4 minutes, then flip. Fry for another 4 minutes until golden brown.
- Drain on paper towels. Serve with sweet chilli sauce for dipping.
- This recipe will make about 40 pieces (which can be cut in half for serving) depending on the size of your wrappers and how much filling you use for each lumpia.
- Lumpia is perfect for freezing and frying later. Just store in tupperware, separating multiple layers of lumpia with parchment or wax paper to keep them from sticking to each other. If you cook them after being frozen, be extra careful when putting into the hot oil as they will likely pop. Make sure to have a cover ready when you put them in. If you have a deep fryer, this is the easiest option.
This is by far my family’s very favorite appetizer and you are right – they disappear as fast as I make them – still learning to roll them tightly (definitely not a cabbage roll), but no matter how they are rolled – everyone LOVES them!! Love your recipes and have already tried several. Thank you for some great new ideas and how beautifully you display all of your directions!
Hi Paula! Thank you so much for the sweet feedback, this made my day! I’m so happy you’re spreading the love of Filipino food to Ryan’s Lithuanian family :) So flattered you enjoy my recipes – cheers! xx
I made these twice in two days. Also made sweet chili dipping sauce. They are well worth the effort. My husband had never even heard of Lumpia, but now he will request I make it often.
This makes me so happy, Donna! Than you for stopping by and for giving this beloved family recipe a try. You are so right – they are well worth the effort!!
Hi Nikki, does some Lumpia have rice stick noodles or something like that in them ?
Hi Esther, thanks for your question! To my knowledge Filipino lumpiang shanghai does not traditionally have rice stick. What you’re describing sounds like Vietnamese style fried spring rolls. Hope that helps!
Hi Nicki…..these were definitely Filipino lumpia…..they had some kind of clear noodle or something in them…..I’ve looked at every recipe for lumpia I find, and none of them mention this….I’ve moved and do not see any of the Aunties anymore, but I’m going to have to get in contact with them and ask what it was….thx so much for getting back to me….have a blessed day
Thank you for this recipe ! I have previously lived in San Diego Ca. where there is a huge population of filipinos and fell in love with their food. I introduced my husband and several family members to lumpia( which seems to be everyones favorite.) I have tried several different recipes, but love yours.
I’m smiling ear to ear, Linda!! So happy you enjoy my mom’s recipe :) keep spreading the love of Filipino food!! Xx
I had made these several years ago on a snow day. A co worker gave me the recipe and I’m sure
everything was the same except I added a couple of diced shrimp (per her recipe). My family LOVED them and I’ve lost the recipe over the years now I will make these and get back to you.
How wonderful! I hope you love it was much as I do!!
I added fresh ginger, finely chopped and substituted diced jicama for water chestnuts. Wow, love Lumpia!
I love this new spin on it and will have to try it sometime!! Thanks for sharing, Donna :)
This will so be my go to recipe for lumpia. I went to 2 Walmart stores and a Kroger’s and couldn’t find lumpia wrappers so I substituted phyllo dough and got a nice thin and crispy result.
Hello there! I’m so happy to hear you made it work with phyllo dough, that sounds delicious! I know it’s difficult to find lumpia wrappers (I’ve only been successful at international grocery stores). Thanks so much for trying out my recipe!!
Just browsing to Pinterest and look who caught my attention…….you! :) Your Lumpia looks divine! You should be very proud of yourself. I’m pretty sure you have one pretty proud momma in heaven. Nice way to honored your mom. Great job Nikki!
Awww, thank you so much Tita Perla!
Thank you for the recipe but l need to let you know that this is not called filipino lumpia. Regular Filipino lumpia consists of meat and vegetable fillings. Ones with only meat fillings wrapped tightly into cylindrical wrappers are referred to as “Shanghai Lumpia”. In addition, the commonly called banana lumpia is actually named Turon.
Yes, you are right! Just wanted to make it easier to remember for mainstream :)
Hello Nikki, i found it hard to find water chestnut in my place, can i substitute water chestnut with mushroom or radish?
Radish would be great since it has a similar texture to water chestnut!
Excellent recipe; I will try it. Be good, I’m off to buy some wrappers and heading south to Baja for some summer fun! Come on down Filipinos. Pass Ensenada, there is a place called Punta Banda and it has a campground with hot showers and/or hot springs in the ocean…and there is La Bufadora and several fine seafood restaurants there; and of course Las Canadas for kids and family near by. Camp or stay at Estero Beach Hotel; Adios Filipinos.
Can these be made a day ahead and placed in the refrigerator until the next day, and then fried up?
Absolutely! You can also freeze them until you’re ready to fry them :)
These look and taste amazing.
I have been trying to think of other side dishes to have along side this but really struggling.
Could you recommend anything?
I’m glad you enjoy them, Derek! I always love lumpia with a side of pancit (noodles)!
Hi Nikki, Literally just found this recepe online and ran to the market to grab the ingredients. Hope it comes out good
I hope you loved them, Naomie!
Can’t wait to try these! Is there a dripping sauce recipe to go along with these? Also interested in a Sho pow recipe? Thanks!
Hi Cindy! I always use a “Sweet Chili Sauce” for dipping (which you can find in the international aisle of any grocery store). If you want to make your own, here’s a good recipe I’ve used before! https://barefeetinthekitchen.com/sweet-chili-dipping-sauce/ Enjoy!!
PS, I’ve never made siopao before, but now that you mention it, I should give it a try!
Can you cook these lumpia in an air fryer instead of frying in oil? I was thinking I could spray with an oil spray but I’m not sure how long to cook then in the air fryer. Any suggestions would be helpful. Can’t wait to try your recipe, it looks delish!
Hi Connie! I’m excited you found my recipe :) Yes you can absolutely cook these in an air fryer! I would recommend preheating the air fryer to about 390 degrees F. Put the lumpia in the basket, making sure they are not touching so you’ll need to cook in batches. Fry for 4-5 minutes; flip and cook until crispy, about 4-5 minutes more. Enjoy!!
Thanks Nikki, I absolutely will try that!
Hope all is well Nikki!!! Steph and I were looking for your wonderful lumpia recipe and we will surprise the boys with this during our wonderful staycation (quarantine style) with some lumpia… All our best to you and your family and keep in touch! Happy Mothers Day!
You two are amazing parents! And I’m extremely flattered that you like my recipe! Enjoy!!! And happiest mothers day to Stephanie :) xx
Nikki, I went to a coworkers house and these were served and they were delicious. About 3 years later I found the recipe and tried them, my whole family loves them. I have to make 2 or 3 times the recipe just to satisfy everyone. Great recipe.
Lori Ann – THIS is why I started this blog. To share the happiness that food can provide!! Thanks so much for trying it, loving it, and sharing your experience <3